Taking cuttings from your plants is a subtle way to encourage new life without starting from seed. If you’ve ever wondered how to get those small stems to grow roots and thrive, you’re not alone. The process might seem straightforward, but there are key steps that can make all the difference between success and disappointment. Before you grab your scissors, it’s worth understanding what really helps cuttings take root.
Understanding Plant Propagation
Although plant propagation might seem complex at first, it’s simply the process of creating new plants from a single parent.
One popular method is using cuttings—sections of a healthy plant, typically 4-6 inches long, cut diagonally just below a node. This encourages the development of a strong root system.
Using 4-6 inch cuttings cut below a node helps encourage strong root growth.
When propagating plants this way, you’ll need to provide adequate light and keep the environment consistent. Changing the water every few days is crucial to prevent stagnation and promote healthy root growth.
Patience is key, as roots may take weeks to form. By monitoring your cuttings carefully and maintaining these conditions, you’ll improve your chances of successfully growing new plants from just a few simple steps.
Choosing the Right Plant for Cutting
Once you understand how cuttings develop roots, the next step is picking the right plant to propagate. Start by selecting healthy specimens, as plants from cuttings need strong, disease-free bases to guarantee successful propagation.
Look for plants with visible nodes since roots typically emerge from these areas, making them crucial for rooting. Ideal candidates include pothos, philodendron, spider plants, and wandering Jew, all known for their easy rooting in water or soil.
Avoid plants sensitive to stress or prone to diseases, as they can hinder rooting success. Before you take cuttings, research the specific light and humidity requirements of your chosen plant to create suitable conditions.
Choosing the right plant lays a solid foundation for propagating healthy, thriving new plants from cuttings.
Tools and Materials Needed for Propagation
Proper tools and materials make plant propagation from cuttings much easier and more successful. You’ll need a sharp knife or pruners to make clean cuts without harming the parent plant. Use a clear glass or container for water propagation to easily monitor root growth. Applying rooting hormone can boost root development, especially for slow-rooting plants. Once roots appear, transfer the cutting to a potting mix or rooting medium like perlite to establish healthy roots. Maintaining humidity with a plastic bag or bell jar also helps.
| Tool/Material | Purpose |
|---|---|
| Sharp knife | Clean cuts |
| Clear glass | Monitor root growth |
| Rooting hormone | Enhance root development |
| Potting mix | Support root establishment |
| Plastic bag/bell jar | Maintain humidity |
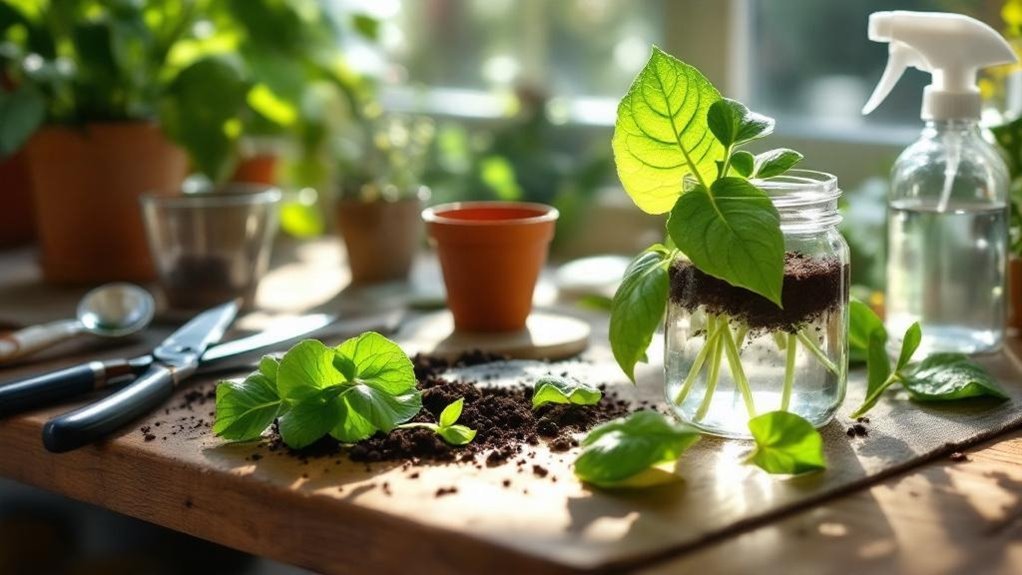
Preparing and Taking Healthy Cuttings
Select healthy stems that are 4 to 6 inches long, making sure each has at least one node, since nodes are where roots will develop.
Make a clean, diagonal cut just below a node to increase the surface area for rooting and reduce plant damage.
Cut just below a node with a diagonal slice to boost rooting and minimize harm to the plant.
Remove the lower leaves from your healthy stems, leaving two or three at the top to prevent rot and help the cutting focus energy on root growth.
Dip the cut end in rooting hormone to encourage faster root development, especially if your plant roots slowly.
When you place your cuttings in water, keep them in a warm spot with indirect light to avoid stress and promote successful rooting.
These steps set a strong foundation for propagating plants successfully from cuttings in water.
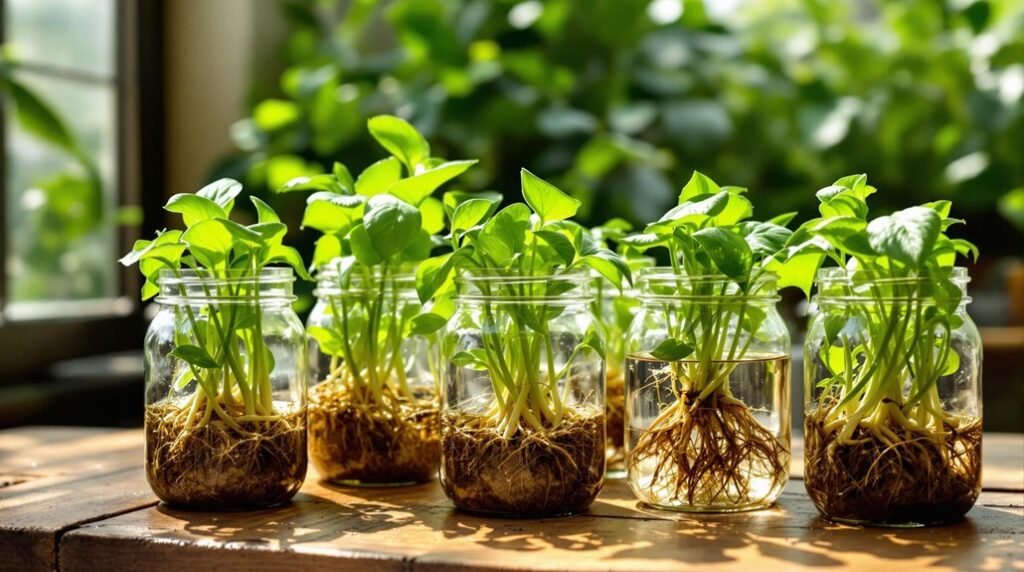
Rooting Cuttings in Water: Step-by-Step
To root cuttings in water successfully, start by placing a healthy 4-6 inch stem in a clear container filled with fresh water, making sure at least one node is submerged while the leaves stay above the surface.
Use a clear plastic container to easily monitor root development. Change the water every few days to keep it fresh and prevent bacterial growth, which can harm your cutting.
Keep an eye out for roots forming, which might take weeks or months depending on the plant. Once you see roots about 2-4 inches long, it’s time to gradually move your cutting from water to potting soil.
This shift helps avoid shock and supports strong, healthy growth in its new environment.
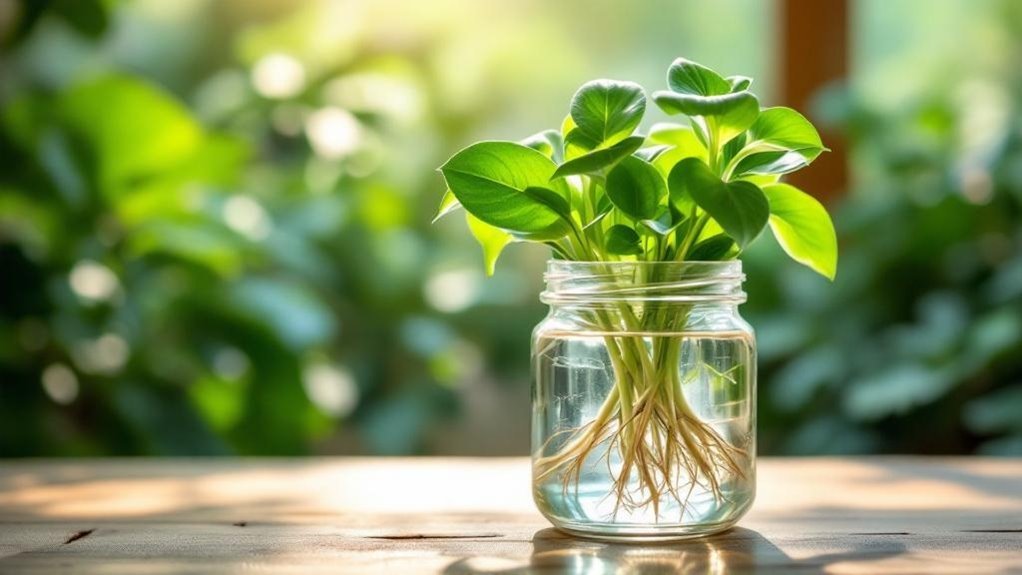
Caring for Water-Propagated Cuttings
Once your cuttings are placed in water, you’ll need to change the water every few days to keep it fresh and prevent harmful bacteria from developing.
Use clear water so you can easily monitor root growth. Place the container in bright, indirect sunlight and maintain a consistent temperature between 65°F and 75°F to encourage healthy roots to grow.
Choose clear water and bright, indirect light with stable warmth to promote vibrant root development.
If humidity is low, cover the cuttings with a plastic bag to create a mini greenhouse effect, but make sure it doesn’t touch the leaves.
Be patient, as it takes time for roots to develop—anywhere from weeks to months depending on the plant.
Watch for new leaves and strong roots before shifting your cuttings gradually from water to soil to avoid shock.
Troubleshooting Common Propagation Issues
Several common issues can arise when propagating plants from cuttings, but you can troubleshoot them effectively by understanding their causes.
Here’s how to tackle typical problems:
- Yellowing leaves often mean overwatering or poor drainage. Check that your soil or water isn’t waterlogged and adjust watering accordingly.
- Wilting leaves may signal low humidity or insufficient water. Mist your cuttings or cover them with a plastic bag to keep moisture levels steady.
- Slow root development can result from the cutting’s age, type, or timing. Verify you take cuttings during the plant’s ideal growing season.
- Mold growth usually indicates stagnant water or excess humidity. Change the water regularly and improve air circulation around your cuttings.
Transitioning Cuttings From Water to Soil
Although cuttings often root well in water, moving them to soil requires a gentle shift to prevent shock.
When shifting cuttings from water to soil, gradually acclimate them over several days. Use a well-draining potting mix that’s moist but not soggy, as water-rooted cuttings aren’t used to heavy soil moisture.
Start by planting the cutting in a small pot, making a hole to avoid damaging delicate roots, then cover gently with soil. Keep the humidity high by covering the cutting with a plastic bag or humidity dome for about a week.
Watch for yellowing leaves or wilting, signs of stress that mean you should adjust care. After 3–4 weeks, once new growth appears, you can reduce humidity and continue normal care.
Best Practices for Long-Term Plant Growth
To guarantee your cuttings thrive long-term, start by selecting healthy, disease-free stems that measure 4-6 inches.
Next, maintain consistent humidity by covering cuttings with a plastic bag or bell jar to reduce water loss and promote root growth.
Follow these best practices for success:
- Change the water in your propagation container every few days to prevent stagnation and harmful bacteria.
- Use a well-draining soil mix when potting rooted cuttings to avoid waterlogged roots, ideally one that is enriched with beneficial mycorrhizae to enhance nutrient absorption.
- Gradually acclimate cuttings to outdoor conditions to minimize transplant shock.
- Monitor for stress signs like yellowing leaves or wilting, and adjust care accordingly.
Frequently Asked Questions
What Is the Best Way to Propagate Plants From Cuttings?
You should choose a healthy 4-6 inch stem, cut diagonally below a node, place it in water or rooting medium, change water regularly, and transplant once roots grow about 4 inches. Rooting hormone helps too.
Is It Better to Root Cuttings in Water or Soil?
You’ll find soil rooting often produces stronger, healthier plants because of better nutrients and stability. Water rooting’s easier to monitor but can create weaker roots. Shift gradually if moving from water to soil to avoid shock.
What Is the Most Successful Propagation Method?
You’ll find the most successful method is stem cuttings—they root quickly and easily with minimal risk. Just cut below a node, keep humidity high, and watch your plant grow with a little patience and care.
What Should You Not Do When Propagating?
You shouldn’t take cuttings from unhealthy plants or let leaves sit submerged in water. Avoid using dirty tools or containers, don’t leave water stagnant, and don’t rush moving rooted cuttings to soil to prevent shock.
Final Thoughts
Propagating plants from cuttings is easier than you might think—did you know over 70% of common houseplants can be successfully grown this way? By selecting healthy stems, keeping nodes submerged in water, and patiently waiting for roots to develop, you’re setting yourself up for success. Remember, changing the water regularly and shifting to soil at the right time will help your new plants thrive. With these simple steps, you’ll enjoy a flourishing indoor garden in no time!