
Imagine you started growing microgreens on your kitchen windowsill last week, and now you’re ready to add fresh, peppery shoots to your salads and sandwiches. It’s a simple process that doesn’t require much space or time, yet it can dramatically boost your meals’ flavor and nutrition. Before you get started, though, there are a few key steps and tips you’ll want to know to guarantee your microgreens thrive.
What You Need to Grow Microgreens at Home
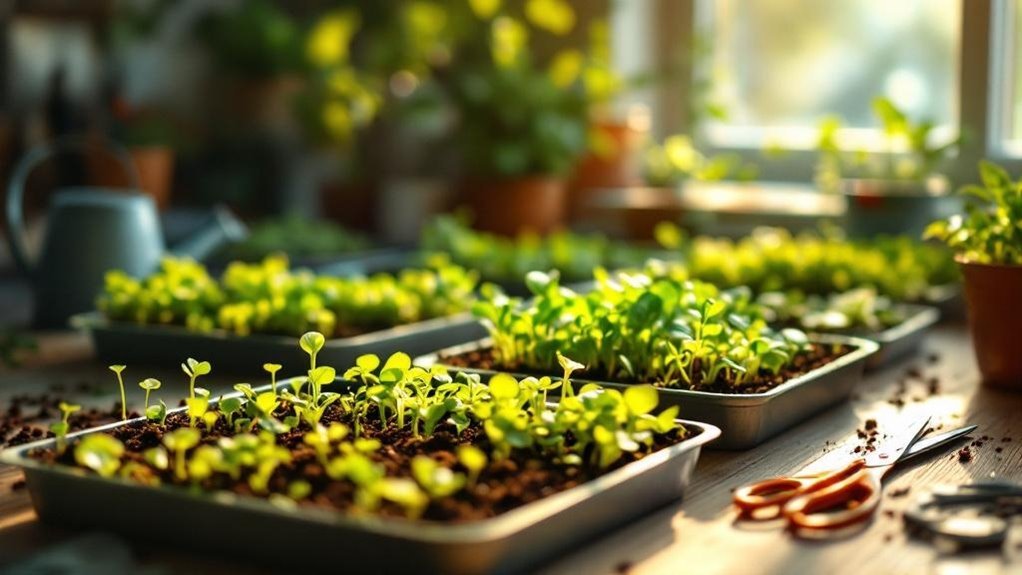
Growing microgreens at home starts with gathering a few essential supplies. First, you’ll need high-quality microgreen seeds—organic or non-GMO varieties like broccoli, radish, or kale work best.
Next, choose an organic potting soil or seedling mix to provide nutrients and retain moisture for healthy growth. A shallow tray about 2 inches deep serves as your growing container, giving seedlings enough room to thrive.
To keep the soil moist without overwatering, use a fine spray bottle for gentle watering. Finally, find a clean surface with access to natural or artificial light to guarantee your microgreens grow well.
Following this step-by-step guide will set you up for a successful microgreen-growing experience right at home.
Differences Between Microgreens and Sprouts
Although microgreens and sprouts both start from seeds, they differ markedly in growth, appearance, and nutrient content.
Sprouts are germinated seeds without leaves, grown mainly in water, and ready to eat in just a few days. In contrast, microgreens are more mature, featuring visible leaves and developed roots, grown in soil or a soil-less medium over 7-14 days.
This growing method enhances their flavor and nutrient density. In fact, microgreens contain up to five times more vitamins and carotenoids compared to sprouts.
While sprouts have a shorter shelf-life and are often eaten raw, microgreens last longer and add vibrant flavor and nutrition to your meals.
Understanding these differences helps you choose the best option for your home-growing goals.
Step-by-Step Guide to Growing Microgreens
To get started with microgreens, you’ll need just a few simple supplies and some patience. Soak seeds for 6-24 hours, then spread them evenly on moistened soil in a shallow tray. Keep the soil moist and cover it to aid germination. After 4 days in the dark, move the tray to a sunny spot with 10+ hours of light daily. Your microgreens will be ready to harvest in 3-5 days. Cut stems just above soil, rinse, and enjoy fresh greens grown at home.
| Step | Action | Tips |
|---|---|---|
| Soak Seeds | 6-24 hours in water | 1 tsp small, 1 tbsp large |
| Sow & Cover | Evenly on moist soil, cover | Keep soil moist |
| Light & Grow | 4 days dark, then light | 10+ hours light daily |
Choosing the Best Seeds and Growing Medium
Choosing the right seeds and growing medium can make all the difference in your microgreen harvest. Start by selecting seeds from a reputable source to reduce contamination risks and boost your chances of success.
Opt for fast-germinating varieties like broccoli, radish, or kale, which also pack a nutritional punch. Before planting, soak the seeds overnight, especially larger ones, to speed up germination.
For your growing medium, pick something that retains moisture without becoming soggy—organic potting soil, coconut coir, or natural fiber mats work well.
Measure your seeds carefully—use about 1 teaspoon for small seeds and 1 tablespoon for larger ones—to guarantee even coverage.
With the right seeds and growing medium, you’re set for a thriving microgreen garden.
Caring for Your Microgreens During Growth
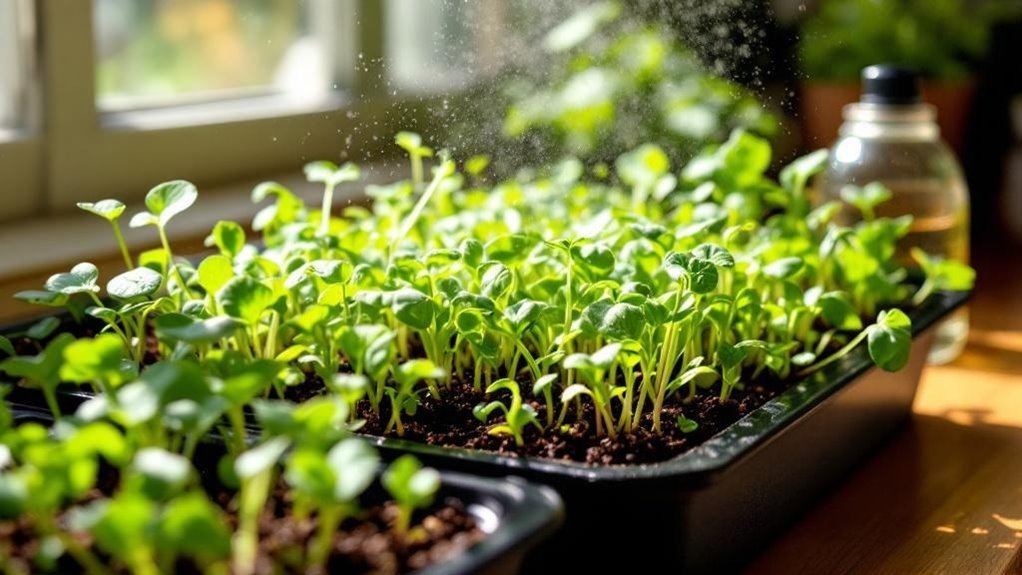
You’ll want to provide your microgreens with 8 to 10 hours of light each day, ideally from a south-facing window, to keep them growing strong and straight.
Provide microgreens 8 to 10 hours of daily light from a south-facing window for optimal growth.
Microgreens need consistent moisture, so water them daily using a spray bottle to keep the seeds moist without saturating the soil. Overwatering can cause root rot and mold, so avoid soggy conditions.
After germination, remove any coverings and keep your trays in a warm spot around 72-75°F to encourage rapid growth.
Rotate your trays every few days to guarantee even light exposure and prevent seedlings from leaning.
Also, space seeds properly to maintain airflow and reduce humidity, which helps prevent mold buildup.
With attentive care, your microgreens will thrive beautifully.
Harvesting and Storing Microgreens
Harvest your microgreens once they develop their first true leaves, usually between 7 and 14 days after germination.
To harvest the microgreens, use clean scissors or a sharp knife to cut the stems just above the soil line. This prevents soil contamination and keeps your greens clean.
After harvesting, avoid washing them immediately if you want to extend their freshness. Instead, store unwashed microgreens in an airtight container lined with dry paper towels to absorb moisture.
Keep the container in the refrigerator, where the microgreens can stay fresh for 3 to 5 days.
Remember to compost the leftover roots and growing medium to stay eco-friendly and prepare for your next batch.
This simple process guarantees you get fresh, flavorful microgreens ready to enjoy.
Creative Ways to Use Microgreens in Your Meals
Microgreens bring vibrant flavors and powerful nutrients to your meals, transforming everyday dishes into healthful delights. Thanks to their impressive nutritional value, microgreens pack 4 to 10 times more vitamins and antioxidants than mature plants.
Microgreens elevate meals with intense flavors and 4 to 10 times more nutrients than mature greens.
You can easily grow these nutrient-dense greens indoors, making fresh microgreens accessible year-round. Add arugula or radish microgreens to wraps and avocado toast for a peppery crunch. Blend broccoli microgreens into smoothies to benefit from sulforaphane’s cancer-fighting properties.
Sprinkle sweet pea shoots over pasta or grain bowls to boost fiber and vitamins. Using microgreens as garnishes not only enhances your plate’s visual appeal but also delivers vital vitamins A, C, E, and K.
Embrace the health benefits of microgreens and get creative with your meals!
Frequently Asked Questions
How to Grow Microgreens Fast?
To grow microgreens fast, soak radish or broccoli seeds for 6-8 hours, spread them evenly in a shallow tray with moist soil, place it in bright sunlight, and mist regularly to keep soil moist without overwatering.
What Are the Easiest Microgreens to Grow for Beginners?
You’ll find radish and broccoli microgreens easiest to grow, sprouting in just 1-2 days with a quick 7-10 day harvest. Pea shoots and sunflower microgreens are also beginner-friendly and nutrient-rich options to try.
How Long Does It Take to Grow Microgreens at Home?
You can grow microgreens in about 7 to 14 days. Fast growers like radish sprout in 1 to 2 days, then need 3 to 5 days of light before harvesting. Keep them watered daily for best results.
What Is the Best Container to Grow Microgreens In?
Did you know microgreens can boost nutrient levels by up to 40% compared to mature plants? You’ll want a shallow tray about 2 inches deep with drainage holes to guarantee healthy root growth and prevent water buildup.
Final Thoughts
Growing microgreens at home is a simple way to boost your meals with fresh, nutrient-packed greens. Did you know microgreens can contain up to 40 times more vitamins and antioxidants than mature vegetables? With just a little time and care, you’ll have flavorful, healthy greens ready in under two weeks. So, grab your seeds, follow the steps, and enjoy the vibrant taste and benefits microgreens bring to your kitchen!