You might think growing daylilies is complicated, but it’s actually quite straightforward when you know the basics. With the right planting time, soil preparation, and care routine, these resilient perennials can brighten your garden year after year. Understanding how to water correctly, choose the best varieties, and handle potential pests will make all the difference. There’s more to learn about maximizing their beauty and even using them in the kitchen.
About Daylilies
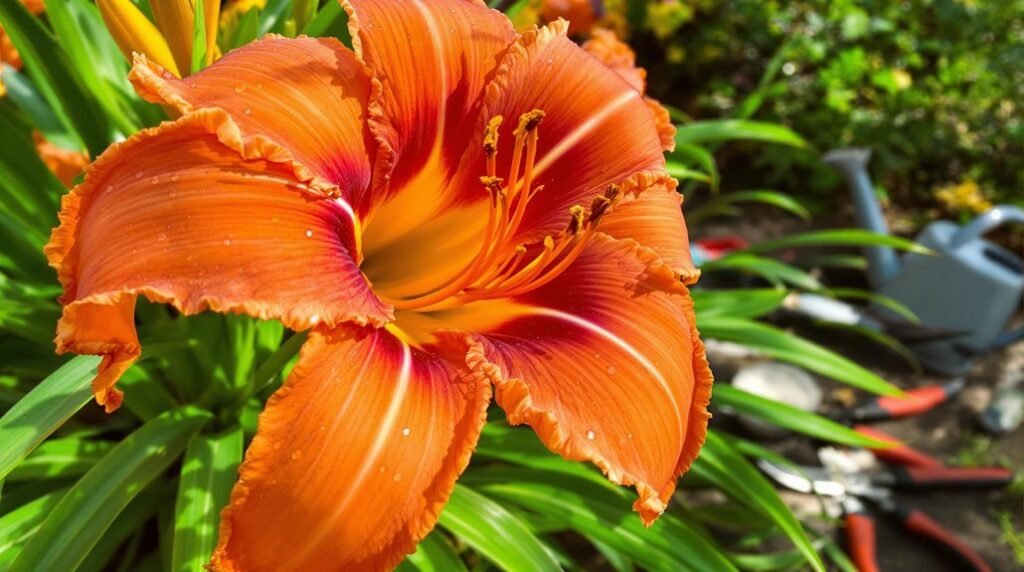
Although daylilies bloom for just one day, their beauty lasts much longer through successive flowers on each stalk. When you plant daylilies, you’ll enjoy a variety of colors and sizes, as they come in thousands of varieties.
These hardy perennials grow well in full sun and thrive in well-drained soil, making them easy to care for in most gardens. Unlike true lilies, daylilies grow from fleshy roots, not bulbs, and can reach heights from under one foot to six feet tall.
Each stalk produces multiple buds, so you’ll see continuous bloom throughout summer. If you want even more flowers, consider reblooming varieties that flower multiple times in a season.
With proper planting and care, daylilies are a reliable, beautiful addition to your garden.
When to Plant Daylilies
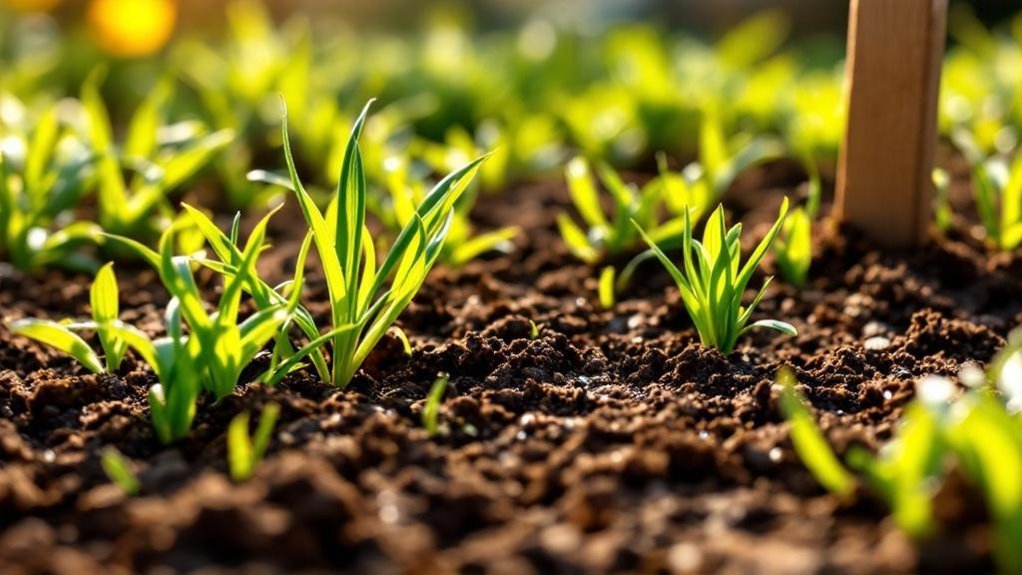
You should plant daylilies either in spring after the last hard frost or in fall at least six weeks before the first frost arrives. Knowing when to plant daylilies helps guarantee they establish well. Both container-grown and bare-root plants do best during these times.
Though summer planting is possible in mild climates, it requires consistent watering. Choose a spot with full sun—at least six hours daily—and well-drained soil to prevent root issues. Daylilies tolerate poor soil but not poor drainage.
After planting, give them about a year to reach full establishment. Once established, they’ll quickly spread into dense clumps, providing a vibrant display. By following these timing guidelines, you’ll enjoy healthy, thriving daylilies year after year.
Choosing and Preparing a Planting Site
Selecting the right planting site sets the foundation for healthy, vibrant daylilies. Choose a spot that receives at least six hours of full sun daily to encourage strong growth and abundant blooms.
Make certain the soil is well-drained and fertile; if it’s lacking nutrients, enrich it with compost or aged manure. Test the soil pH to verify it falls between 6.0 and 7.0, as this range supports peak nutrient uptake.
Ensure soil is well-drained and fertile, enriched with compost or manure, with pH between 6.0 and 7.0 for best growth.
Avoid planting near large trees or shrubs to prevent competition for water and nutrients, maintaining an ideal growing environment.
When preparing the site, dig a hole wide enough for the root spread, and position the crown of the plant level with the soil surface to promote healthy establishment and growth.
How to Plant Daylilies
Planting daylilies at the right time and in the right way sets them up for strong growth and vibrant blooms. You should plant daylilies in spring after the last hard frost or in fall, at least six weeks before the first frost.
Choose a spot with full sun—at least six hours daily—and well-drained soil rich in organic matter like compost.
When planting daylilies, dig a hole wide enough to fit the roots comfortably, placing the crown about an inch deep and level with the soil.
After planting, water thoroughly to saturate the root zone, ensuring consistent moisture during the establishment period.
Proper planting encourages healthy growth and lets you enjoy a range of flower colors season after season.
Watering and Fertilizing Daylilies
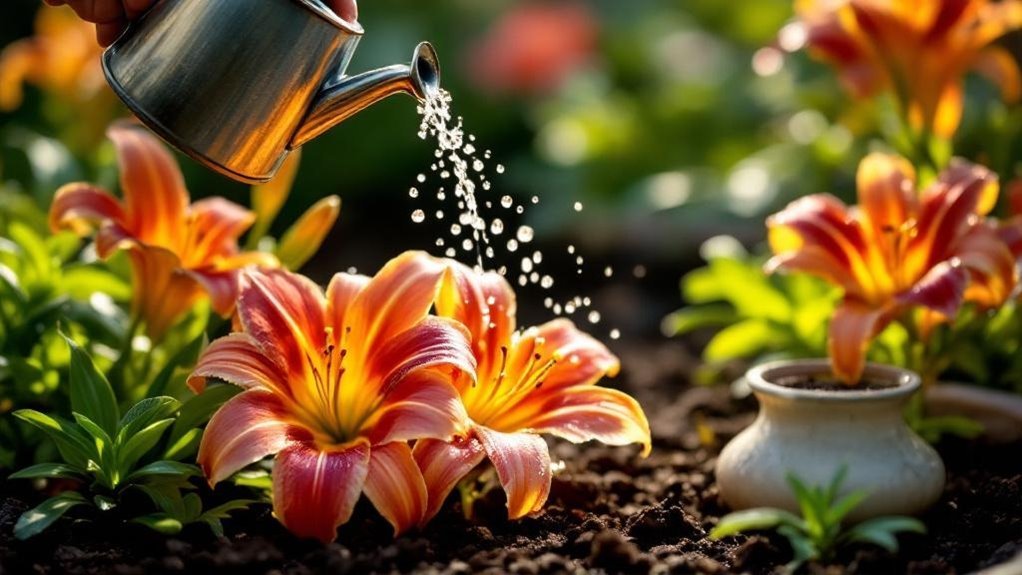
Proper watering and fertilizing play a crucial role in keeping your daylilies vibrant and healthy. Aim for about 1 inch of water per week, increasing moisture during the blooming season and hot spells for ideal growth. Consistent watering helps prevent stress and supports strong blooms.
Mulch around your daylilies to retain soil moisture, suppress weeds, and slowly add nutrients as it breaks down. Fertilizing isn’t always necessary, but if your soil is poor, apply a balanced fertilizer in early spring to boost growth and flower size.
During mid-summer, switch to low-nitrogen fertilizers to maintain plant health without encouraging excessive foliage. By managing watering and fertilizing carefully, you’ll guarantee your daylilies thrive throughout the growing season with abundant, colorful blooms.
Pruning and Dividing Daylilies
Keeping your daylilies healthy goes beyond watering and fertilizing; pruning and dividing play a big part too.
To prune daylilies, remove dead foliage in early spring and cut back spent flower stalks to the base after blooming. This encourages new growth and keeps plants vigorous.
Remove dead foliage in spring and trim spent flower stalks to promote fresh growth and vitality.
For division of daylilies, follow these steps:
- Dig up the root clump in early spring or late summer to prevent overcrowding.
- Remove excess soil and separate the crown into smaller clumps with healthy roots.
- Replant divisions promptly, ensuring each has leaves.
- Water thoroughly to reduce transplant shock and support establishment.
Watch for overcrowding signs like fewer blooms, signaling it’s time to divide again every 3 to 5 years.
Popular Daylily Varieties
When you choose daylilies for your garden, selecting popular varieties can guarantee vibrant color and reliable blooms throughout the season.
Consider daylily varieties like Stella de Oro, famous for its reblooming vibrant yellow flowers, and Ruby Spider, with large ruby-red blooms and a golden throat.
Primal Scream thrives as a mid-summer blooming variety, offering striking ruffled orange petals that add vibrant color to any bed.
Orange Smoothie blooms from early summer to fall, showcasing eye-catching orange flowers with a subtle rose band.
Going Bananas is a compact, reblooming yellow variety that performs well in zones 3-9.
For warmer climates, choose evergreen varieties or semi-evergreen types like Wind Frills and So Sweet, which keep their lush foliage green through winter.
Dealing With Pests and Diseases
Selecting vibrant daylily varieties is just the start; you’ll also want to protect your plants from common pests and diseases to keep them thriving.
Daylilies can attract pests like aphids and thrips, which damage flower buds if ignored. To maintain plant health, follow these steps:
- Regularly monitor your daylilies for early signs of pests or diseases.
- Use insecticidal soap or strong water sprays to control aphids and thrips effectively.
- Avoid overcrowded plantings to reduce disease risks and improve air circulation.
- Practice good soil management by ensuring proper drainage and nutrient balance.
Landscaping With Daylilies
Daylilies offer incredible versatility in landscaping, making them a favorite for gardeners looking to add both color and structure.
You can use daylilies in mass plantings along slopes, which not only create striking visual impact but also help with soil erosion control thanks to their dense root systems.
Planting rows of daylilies near driveways or home foundations forms a vibrant color border that thrives in full sun. For added interest, pair them with other sun-loving perennials like catmint and hostas.
Create vibrant borders with daylilies and pair them with sun-loving perennials like catmint and hostas.
Smaller daylily varieties work well in container displays, perfect for patios or mixed plantings.
To enjoy blooms longer, combine early, mid, and late-blooming daylily cultivars, extending the blooming period from mid-summer through fall.
This approach guarantees your landscaping stays lively and colorful all season.
Culinary Uses of Daylilies
Although often admired for their beauty, daylilies can also add a unique touch to your meals.
Every part of the daylily is edible and offers a mild peppery taste that elevates various dishes.
Here’s how you can incorporate these nutritious plants into your culinary routine:
- Consume tender foliage as a fresh spring green.
- Add buds and flowers raw to salads or soups for flavor and vibrant color.
- Sauté buds in butter and garlic for a tasty side dish.
- Use daylily flowers as an attractive garnish or deep-fry buds for a special treat.
Frequently Asked Questions
How to Properly Care for Daylilies?
You’ll want to plant daylilies in full sun with well-drained soil, water them regularly, fertilize in spring, deadhead spent blooms, remove yellow leaves, and divide every few years to keep them healthy and blooming beautifully.
How to Keep Your Daylilies Blooming All Summer?
To keep your daylilies blooming all summer, plant varieties with staggered bloom times, deadhead spent flowers regularly, water consistently, fertilize in spring, and divide plants every few years to prevent overcrowding and promote healthy growth.
What Month Do You Cut Back Daylilies?
You’ll want to cut back your daylilies in early spring, just before new growth bursts forth like a fireworks show. Usually, April’s perfect—removing dead foliage helps your plants breathe and bloom brighter all season long.
Where Is the Best Place to Plant Daylilies?
You should plant daylilies in a spot that gets at least six hours of direct sunlight daily. Choose well-drained, fertile soil and space them 1.5 to 3 feet apart for healthy growth and blooming.
Final Thoughts
You might think daylilies require too much effort, but they’re actually low-maintenance and incredibly rewarding. By planting them in well-drained soil with plenty of sun, watering consistently, and dividing every few years, you’ll enjoy vibrant blooms year after year. Plus, their edible buds add a unique touch to your kitchen. With just a little care, daylilies bring lasting beauty and versatility to your garden without the hassle you might expect.