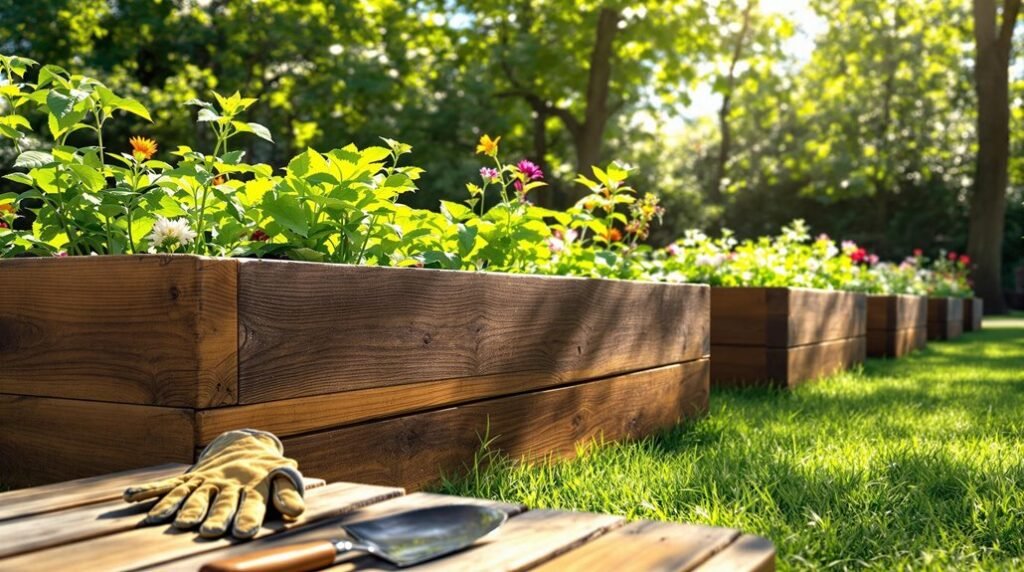
Building raised garden beds might seem simple, yet it requires careful planning and execution to get right. You’ll need to choose the perfect spot, gather the right materials, and assemble everything with precision. If you want your garden to thrive and last for years, there are key steps you can’t overlook. Keep going to find out how to create a sturdy, effective raised bed that suits your space perfectly.
Tools and Materials Needed for Raised Bed Construction
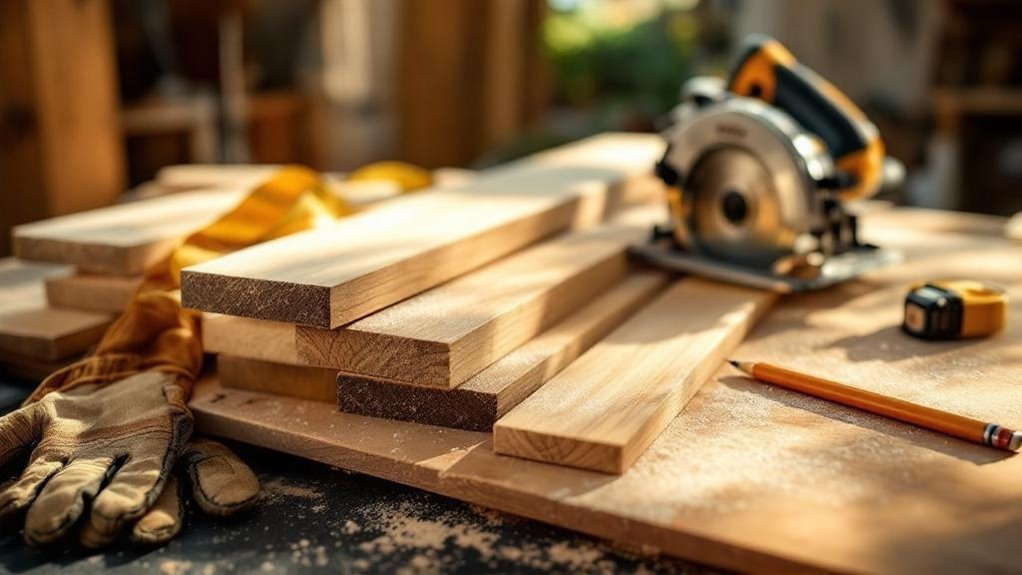
Before you begin building your raised garden bed, gather the vital tools and materials to streamline the process. You’ll need fundamental tools like a saw for cutting wood, a hand drill with a 1/4-inch drill bit, and a bolt tightener to secure screws and nuts efficiently.
For materials, start with 4 cedar boards measuring 2x6x8 feet, which you’ll cut into eight 4-foot lengths. Include framing angles, hex screws, washers, and nuts for assembly. To guarantee durability, consider a food-safe sealer if you use pressure-treated lumber.
Don’t forget hardware cloth to line the bottom of your bed; it prevents weeds while allowing proper drainage and root growth. Aim for a raised bed height of at least 6 inches for easier access and healthier plants.
Selecting the Best Location for Your Raised Bed
Choosing the right spot for your raised garden bed is crucial to guarantee your plants thrive. Aim for a location that gets six to eight hours of direct sunlight daily to maximize plant growth.
Pick a flat, level area to guarantee proper drainage and bed stability—avoiding water pooling is key. Steer clear of shaded spots near trees or buildings, as insufficient sunlight can stunt your plants.
Also, consider accessibility; your location should allow easy planting, maintenance, and harvesting, with enough space to move comfortably around the raised beds.
If you’re placing the bed over lawn, remove the sod and loosen the soil underneath to prevent grass from invading and to encourage strong root development.
Thoughtful location choice sets your garden up for success.
Cutting and Preparing Lumber for the Frame
Start by measuring and marking the lumber accurately to match the dimensions of your raised garden bed frame. Use a pencil to clearly mark the lengths on your boards, ensuring precision when cutting.
For the frame, cut two 2×6 boards into four 4-foot sections to form the sides. If your design needs corners or additional supports, measure and mark those boards accordingly.
Use a circular saw or miter saw to make clean, straight cuts, supporting each board firmly to avoid bowing or splintering. Inspect every board for warping or defects before moving on—straight boards build a stronger, more stable frame.
If your raised bed has angled or decorative edges, use a miter saw for precise angled cuts to maintain a professional look.
Assembling the Raised Bed Frame
Gather your cut lumber and lay out the boards to form the rectangular frame of your raised garden bed.
Position the four corner posts at each end where the side and end boards meet. Before fastening, drill pilot holes in the boards and posts to prevent splitting.
Align everything carefully, making sure the raised bed frame is square with a framing square. Use deck screws to secure the boards to the corner posts, driving them in firmly for a tight fit.
Double-check that all corners are flush and the frame sits level. Taking these precise steps guarantees your raised bed frame is sturdy and ready for the next stage.
Avoid rushing; a solid assembly here sets the foundation for a durable garden bed.
Securing Corners and Adding Support
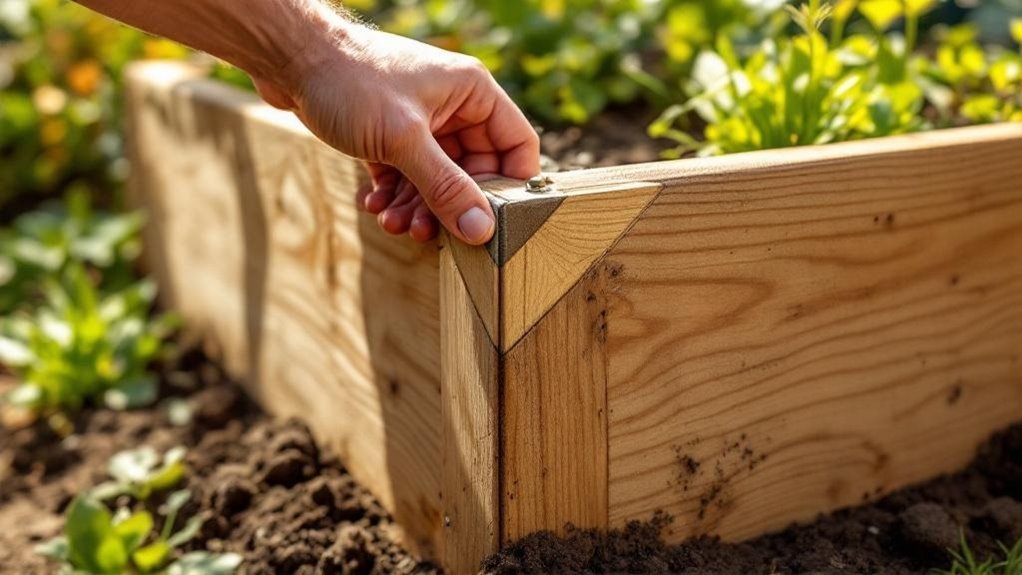
When you secure the corners of your raised garden bed, make certain to align the boards at a perfect 90-degree angle and drill pilot holes before fastening them with galvanized screws. This prevents splitting and guarantees lasting stability.
To boost structural integrity, add corner stakes—2-foot 4×4 posts driven into the ground—that anchor your bed firmly. For larger beds, incorporate framing supports every 4 feet to avoid warping and keep your structure sturdy.
Using framing angles or brackets at each corner also helps create rigid connections, maintaining a square and stable frame. Remember to regularly check and tighten screws during the growing season as soil settles.
- Align boards at 90 degrees and pre-drill pilot holes
- Add 4×4 corner stakes for deeper anchoring
- Install framing supports every 4 feet for added strength
Preparing the Ground and Installing the Bed
Once your raised garden bed frame is securely assembled and anchored, focus on preparing the ground beneath it.
Start by clearing the area of sod, grass, and weeds to create a clean foundation. Next, level the ground to guarantee your raised bed sits evenly, which helps prevent water from pooling and promotes proper drainage.
Clear sod and weeds, then level the ground for even placement and optimal drainage of your raised bed.
To further protect your garden, consider laying down a weed barrier cloth or landscape fabric at the bottom of the bed; this stops weeds from growing up while allowing water to flow through.
Position your raised bed where it’ll get six to eight hours of sunlight daily, crucial for healthy plant growth.
With the ground prepped, your raised bed is ready for filling with nutrient-rich soil, setting the stage for a thriving garden.
Filling the Raised Bed With Soil and Compost
Although assembling and positioning your raised bed sets the foundation, filling it with the right soil mix is crucial for plant health. When filling the raised bed with soil, aim for a blend of 60% topsoil and 40% compost to promote healthy plant growth.
Start by adding a layer of coarse materials like gravel for proper drainage. Then, mix in organic matter such as aged manure or leaf mold to enrich nutrients and enhance soil structure. Fill the bed to at least 6 to 12 inches deep to allow roots ample space to grow.
- Use a 60/40 ratio of topsoil to compost
- Add gravel or small stones for drainage
- Incorporate aged manure or leaf mold for nutrients
Lightly compact the soil to remove air pockets before planting.
Planting and Maintaining Your Raised Garden Bed
Since a well-prepared soil mix sets the stage, you’ll want to plant your seeds or seedlings following their specific spacing and depth needs.
Group plants with similar water and light requirements to make maintenance easier. Use nutrient-rich soil that blends topsoil, compost, and organic matter for healthy growth. Additionally, consider incorporating a fertilizer with a balanced NPK ratio to ensure your plants receive essential nutrients for robust development.
For irrigation, water your plants regularly, preferably in the morning to reduce evaporation. A drip irrigation system guarantees consistent moisture while conserving water.
Apply mulch around your plants to retain soil moisture, suppress weeds, and regulate temperature.
Don’t forget to rotate crops each season to keep soil nutrients balanced and prevent pests or diseases.
Frequently Asked Questions
What Kind of Wood Should Be Used for Raised Beds?
You should use rot-resistant woods like cedar or redwood for raised beds because they last longer. Avoid creosote-treated wood, and if you choose pressure-treated lumber, line it with plastic to protect your plants.
Is It Cheaper to Build Your Own Raised Beds?
Why pay more when you can save? You’ll spend less building your own raised beds using local, reclaimed wood and avoid shipping fees. Plus, you’ll customize your garden perfectly without overspending on kits.
What Do You Put in the Bottom of a Raised Garden Bed?
You should put a layer of gravel or small stones at the bottom for drainage, then add cardboard or newspaper to suppress weeds. Consider using organic materials and landscape fabric to improve soil quality and prevent erosion.
What Vegetables Should Not Be Grown in a Raised Bed?
Imagine trying to fit a sprawling pumpkin into a tiny box—it just won’t thrive. Avoid growing deep-rooted veggies like carrots, sprawling squash, or tall corn in raised beds; they need more space and depth than you can provide.
Final Thoughts
Building your raised garden bed is like planting the seed of a beautiful future—once set up, it creates a strong foundation for your plants to thrive. By choosing the right spot, assembling the frame carefully, and filling it with rich soil, you’re giving your garden the best start. With just a little care and maintenance, your raised bed will grow into a vibrant, productive space that brings joy season after season. Get ready to watch your garden flourish!